Three.jsのBufferGeometry
「Three.jsでロコモーション」でロコモーションする方法を調べていたとき、頂点座標の更新方法がわからず、もっとThree.jsについて理解する必要があると思ったので、Three.jsのBufferGeometryについて調べました。※Three.jsはr117を使用しています。
Three.jsのBufferGeometry
● BufferGeometry
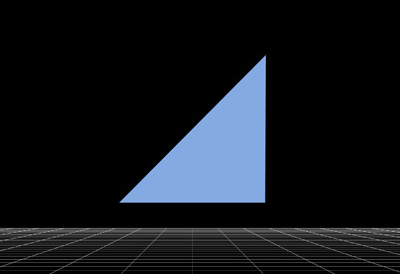
Three.jsのバッファーオブジェクトは、シェーダプログラム内で使用する頂点データを直接操作できる形状オブジェクトで、BufferGeometryを使用して生成します。
バッファーオブジェクトは生成時、何も情報を持っていないので頂点データを定義する必要があります。
頂点データは、バッファーオブジェクトのattributeに、BufferAttributeを使用して設定します。
//バッファーオブジェクトの生成
const geometry = new THREE.BufferGeometry();

//型付配列で頂点座標を設定
const vertices = new Float32Array([
	-1.0,-1.0,1.0,
	1.0,-1.0,1.0,
	1.0,1.0,1.0,
	]);

//バッファーオブジェクトのattributeに頂点座標を設定
geometry.setAttribute('position',new THREE.BufferAttribute(vertices,3));

const material = new THREE.MeshBasicMaterial({color:0x3366cc});
const mesh = new THREE.Mesh(geometry,material);
scene.add(mesh);
● GeometryとBufferGeometry
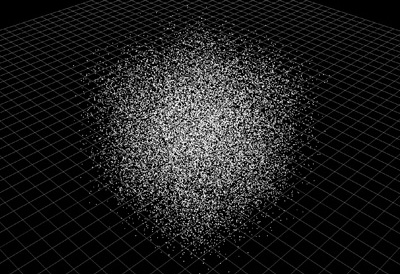
Geometryは毎フレームごとに頂点データをCPUからGPUに転送するのに対し、BufferGeometryは最初の1度だけGPUに転送しその後はGPUで処理するため、パーティクルなど大量の頂点を操作する場合などに効果を発揮します。
※Geometryはr125から廃止になり、SphereGeometryなどはBufferGeometryを継承するようになりました。(2021年3月27日)
● 頂点座標の更新
頂点座標を更新するには、attributeを動的に変更し、points.geometry.attributes.position.needsUpdateをtrueにします。上記は頂点データを更新したことを通知するためのフラグなので、毎フレームごとに設定する必要があります。
let positions,points;
let L = 10;

//パーティクルの生成
const num = 25000;
positions = new Float32Array(num*3);
const geometry = new THREE.BufferGeometry();

for (let i=0; i < positions.length; i+=3){
	let x = L * Math.random() - L/2;
	let y = L * Math.random() - L/2;
	let z = L * Math.random() - L/2;
	positions[i] = x;
	positions[i+1] = y;
	positions[i+2] = z;
}
geometry.setAttribute('position',new THREE.BufferAttribute(positions,3));

const material = new THREE.PointsMaterial({size:0.1});
points = new THREE.Points(geometry,material);
scene.add(points);

function rendering(){
	requestAnimationFrame(rendering);

	//パーティクルの頂点座標の更新
	for (let i = 0; i < positions.length; i+=3){
		let dx = L/50 * (Math.random() - 1/2);
		let dy = L/50 * (Math.random() - 1/2);
		let dz = L/50 * (Math.random() - 1/2);

		//attributeを動的に変更
		points.geometry.attributes.position.array[i] += dx;
		points.geometry.attributes.position.array[i+1] += dy;
		points.geometry.attributes.position.array[i+2] += dz;
	}

	//更新を通知するフラグ
	points.geometry.attributes.position.needsUpdate = true;

	renderer.render(scene,camera);
}
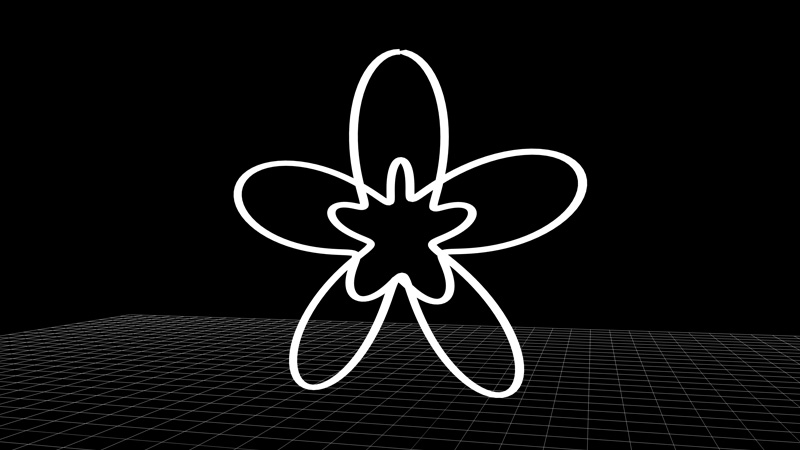
● BufferGeometryで線を描画
Three.jsのCurveExtras.jsを使用すると、いろいろな形のカーブを生成することができます。また、カーブから頂点座標を取得し、頂点座標からバッファーオブジェクトを生成することができるので、BufferGeometryで線を描画しました。
import { Curves } from './lib/three_jsm/CurveExtras.js';

//CurveExtras.jsを使用してカーブを生成
const path = new Curves.DecoratedTorusKnot4a();

//頂点座標を取得
const points = path.getPoints(500);

//頂点座標からバッファーオブジェクトを生成
const geometry = new THREE.BufferGeometry().setFromPoints(points);

const material = new THREE.LineBasicMaterial();
const line = new THREE.Line(geometry,material);
scene.add(line);
Three.jsのLineBasicMaterialは線の太さを調整できません。1pxの線だと細いので、THREE.MeshLineを使用して線の太さを調整しました。
import { Curves } from './lib/three_jsm/CurveExtras.js';
import MeshLine from './lib/three_jsm/meshline/MeshLine.js';
import MeshLineMaterial from './lib/three_jsm/meshline/MeshLineMaterial.js';

const path = new Curves.DecoratedTorusKnot4a();
const points = path.getPoints(500);
const geometry = new THREE.BufferGeometry().setFromPoints(points);

//MeshLineを使用
const meshLine = new MeshLine();
meshLine.setGeometry(geometry);
const lineMaterial = new MeshLineMaterial({
    	lineWidth:0.15
});

const customline = new THREE.Mesh(meshLine.geometry,lineMaterial);
scene.add(customline);

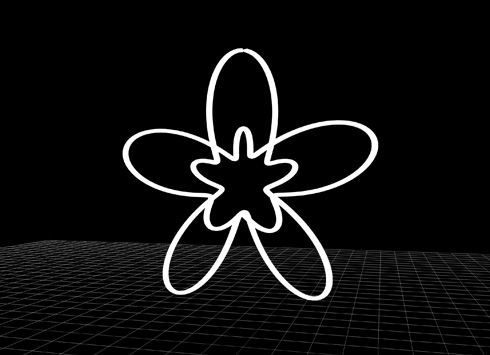
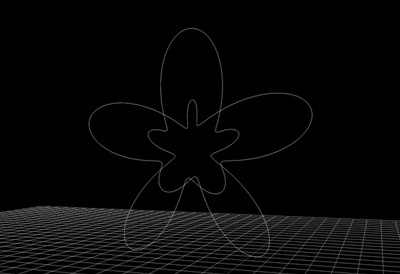
完成したデモになります。BufferGeometryを使用すると表現の幅が広がりそうです!BufferGeometryのデモなのでパソコンとスマホで見ることができるようにしました。