glTFをThree.jsで読み込み
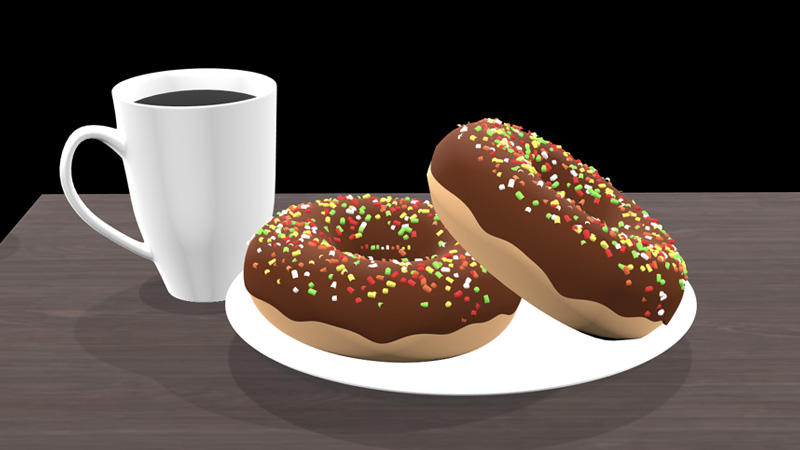
「Blenderで3DCG制作」で制作したドーナツをglTFに出力して、Three.jsで読み込んでみました。
BlenderからglTFを出力
● glTFとは
glTF (GL Transmission Format)は、Khronos Groupによって提唱された、JSON形式の3Dファイルフォーマットです。もともとOpenGL(特にWebGL)での利用が想定され、現在のバージョンはglTF2.0です。

● glTF Exporterの準備
BlenderでglTFを出力するためには、アドオンのglTF Exporterが必要です。
GitHubからデータをダウンロードして、「scripts/addon/io_scene_gltf2」を Blenderのアドオンディレクトリに追加します。アドオンディレクトリは、Macの場合、Blenderアプリを右クリックして、「パッケージの内容を表示」から、「Contents/Resources/2.79/scripts/addons」です。
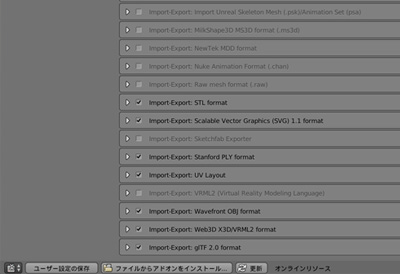
「ユーザー設定 > アドオン」の「Import-Export:glTF 2.0 format」にチェックを入れて更新し、アドンを有効化します。
● PBRマテリアルの設定
マテリアルとテクスチャを表示させるため、BlenderでPBRマテリアルを設定しました。PBR(物理ベースレンダリング)は現実の光学現象をシミュレートすることにより、リアルな質感を表現できるレンダリング方法です。
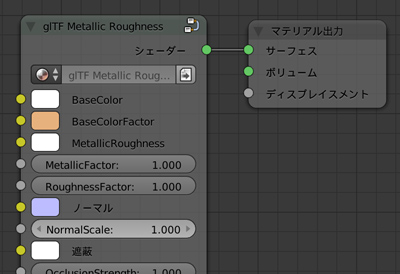
GitHubからダウンロードしたデータの「pbr_node」中に「glTF2.blend」があるので、「ファイル > リンク > glTF2.blend」を選択します。その中の「NodeTree > glTF Metallic Roughness」を選択すると、ノードエディターでglTF Metallic Roughnessが使用できるようになります。
ノードエディターの「追加 > グループ」の中にglTF Metallic Roughnessが追加されます。マテリアルカラーを設定したい場合は、BaseColorFactorのカラーを設定します。テクスチャを設定したい場合は、Image TextureをBaseColorにつなげます。詳細は、英語ですが下記ページに書いてあります。
● glTFを出力
準備ができたら「ファイル > エクスポート > glTF2.0 (.gltf)」で出力します。設定はデフォルトのままで問題ありません。
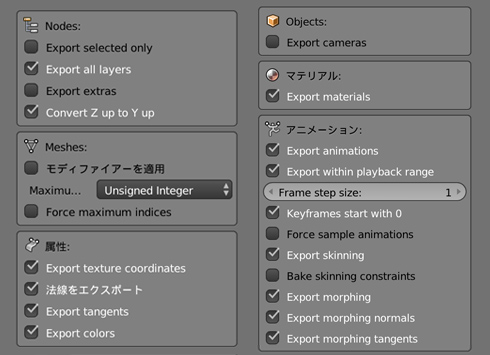
必要であれば、glTFを出力するさい、モディファイアーを適用しておきます。
Three.jsでglTFを読みこみ
● Three.jsで読み込む
出力したglTFは、THREE.GLTFLoaderで読み込むことができます。
//glTFの読み込み
const gltfLoader = new GLTFLoader();

gltfLoader.load('./donut.gltf',function(data){
	const gltf = data;
	const obj = gltf.scene;
	scene.add(obj);
});

//読み込んだシーンが暗いので、明るくする
renderer.outputEncoding = THREE.GammaEncoding;
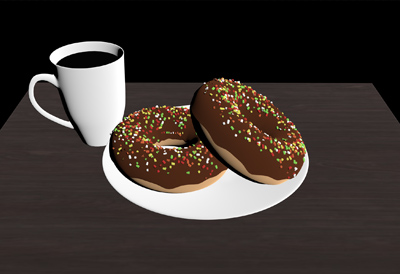
マテリアルとテクスチャが反映され、ドーナツが表示されました。
ただ、皿と机に影ができていません。また、ライティングはThree.jsで設定するので、ライティングと影を調整します。影のつけ方は、「Three.jsでオブジェクトを選択」で説明していますが、皿と机に影をつけるためには、それぞれMeshを取得する必要があります。
glTFはJSONデータで、読み込んだglTFの中のMeshは、下記のように「.children」で取得することができます。Meshの名前はBlenderで設定したものが入っています。
//glTFの読み込み
const gltfLoader = new GLTFLoader();

gltfLoader.load('./donut.gltf',function(data){
	const gltf = data;
	const obj = gltf.scene;

	for(let i = 0; i < obj.children.length; i++){

		let mesh = obj.children[i];

		//コンソールにMeshの名前一覧を出力。
		//console.log(i,mesh.name);
	}
	scene.add(obj);
});

//読み込んだシーンが暗いので、明るくする
renderer.outputEncoding = THREE.GammaEncoding;
まだまだわからないことが多く、もっと質感やクオリティはあげられると思いますが、一旦ライティングと影を調節して完成です。
● script.js
必要なライブラリを読み込みます。
<script src="js/TweenMax.min.js"></script>
Three.js関連のライブラリはscript.jsからインポートするので、script.jsはtype="module"をつけて読み込みます。
<script src="js/script.js" type="module"></script>
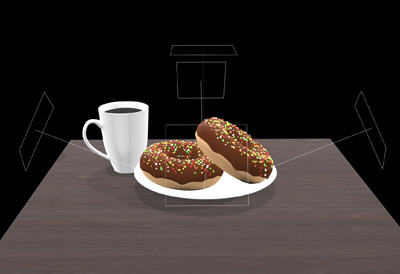
完成したscript.jsです。ライティングは、上からと四方からあてて、影が綺麗に見えるようにしました。
//===============================================================
// Import Library
//===============================================================
import * as THREE from './lib/three_jsm/three.module.js';
import { OrbitControls } from './lib/three_jsm/OrbitControls.js';
import { GLTFLoader } from './lib/three_jsm/GLTFLoader.js';

//===============================================================
// Main
//===============================================================
window.addEventListener('load',function(){
   init();
});

let scene,camera,renderer;
let orbitControls;

function init(){
    scene = new THREE.Scene();
    camera = new THREE.PerspectiveCamera(50,window.innerWidth/window.innerHeight,0.1,1000);
    camera.position.set(0,6,9);
    scene.add(camera);
    renderer = new THREE.WebGLRenderer({antialias:true});
    renderer.setPixelRatio(window.devicePixelRatio);
    renderer.setSize(window.innerWidth,window.innerHeight);
    renderer.setClearColor(new THREE.Color(0x000000));
    renderer.physicallyCorrectLights = true;
    renderer.shadowMap.enabled = true;
    renderer.shadowMap.type = THREE.PCFSoftShadowMap;

    const container = document.querySelector('#canvas_vr');
    container.appendChild(renderer.domElement);

    window.addEventListener('resize',function(){
        camera.aspect = window.innerWidth/window.innerHeight;
        camera.updateProjectionMatrix();
        renderer.setSize(window.innerWidth,window.innerHeight);
    },false);

    setLoading();
}

function setLoading(){
	TweenMax.to('.loader',0.1,{opacity:1});

	const gltfLoader = new GLTFLoader();
	gltfLoader.load('./data/donut.gltf',

		function(gltf){
			const obj = gltf.scene;
			for(let i = 0; i < obj.children.length; i++){

				let mesh = obj.children[i];
				if(i >= 1000){
					if(i==1014 || i==1019){
						mesh.receiveShadow = true;
					}
					mesh.castShadow = true;
				}
			}
			scene.add(obj);

			TweenMax.to('#loader_wrapper',1,{
                opacity:0,
                delay:1,
                onComplete: function(){
                    document.getElementById('loader_wrapper').style.display ='none';
                }
            });
            threeWorld();
			setLight();
			setController();
			rendering();
		});
}

function threeWorld(){
	renderer.outputEncoding = THREE.GammaEncoding;
}

function setLight(){
	const ambientLight = new THREE.AmbientLight(0x666666);
	scene.add(ambientLight);

	const positionArr = [
			[0,5,0,2],
			[-5,3,2,2],
			[5,3,2,2],
			[0,3,5,1],
			[0,3,-5,2]
		];

	for(let i = 0; i < positionArr.length; i++){
		const directionalLight = new THREE.DirectionalLight(0xFFFFFF, positionArr[i][3]);
		directionalLight.position.set( positionArr[i][0], positionArr[i][1], positionArr[i][2]);

		if(i == 0 || i == 2 || i == 3){
			directionalLight.castShadow = true;
			directionalLight.shadow.camera.top = 50;
			directionalLight.shadow.camera.bottom = -50;
			directionalLight.shadow.camera.right = 50;
			directionalLight.shadow.camera.left = -50;
			directionalLight.shadow.mapSize.set(4096,4096);
		}
		scene.add(directionalLight);

		//const helper = new THREE.DirectionalLightHelper( directionalLight, 1);
		//scene.add(helper);
	}
}

function setController(){
    document.addEventListener('touchmove',function(e){e.preventDefault();},{passive:false});
    orbitControls = new OrbitControls(camera,renderer.domElement);
    orbitControls.enableDamping = true;
    orbitControls.dampingFactor = 0.5;
}

function rendering(){
    if(orbitControls){
        orbitControls.update();
    }
    requestAnimationFrame(rendering);
    renderer.render(scene,camera);
}

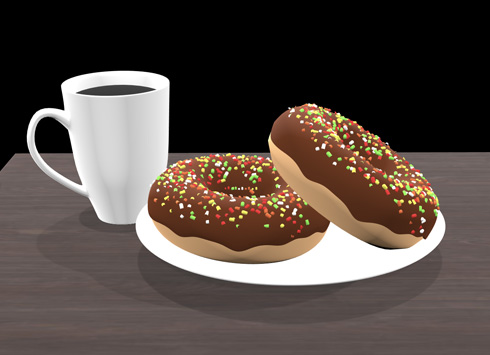
完成したデモになります。Oculus Goで確認したところ、スプリンクルの数が多すぎて負荷がかかりすぎているようなので、パソコンとスマホのみで見ることができるようにしました。
※「Blender2.8でglTFを出力」で、Blender2.8でPBRマテリアルを使用して、より綺麗にglTFを出力する方法を更新しました。(2019年9月16日)