Three.jsでglTFアニメーション
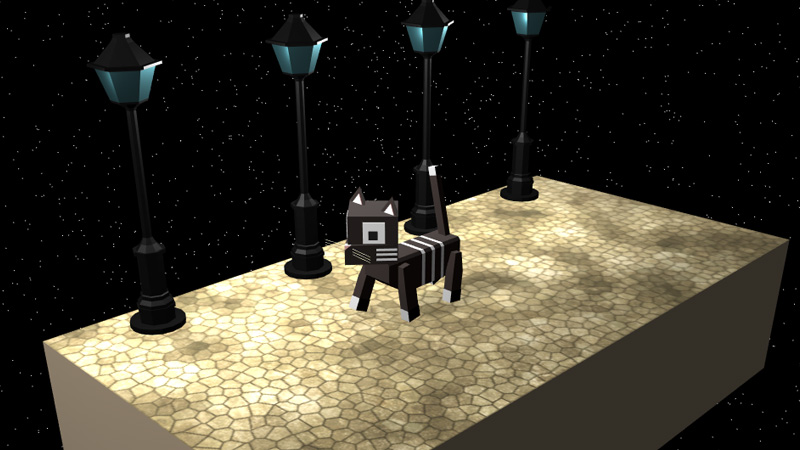
「Blender2.8でアニメーション」で制作したアニメーションを、glTFに出力してThree.jsで読み込んでみました。
Blender2.8でglTFを出力
まず、Blender2.8でglTFを出力します。箱ねこの位置を調整しやすいように、道と街灯と箱ねこを別々にglTFに出力しました。
● 道と街灯を出力

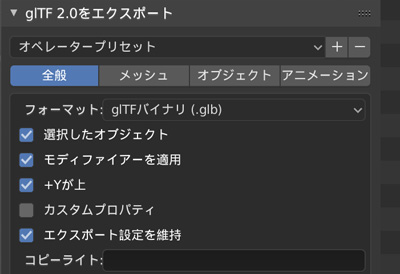
道と街灯のオブジェクトを選択して、トップバーの「ファイル > エクスポート > glTF2.0(.glb/.gltf)」をクリックします。glTF2.0をエクスポートする画面が表示されるので、選択したオブジェクトとモディファイアーを適用をチェックして、右上のglTF2.0をエクスポートをクリックしてglTFを出力します。
● 箱ねこのアニメーションを出力

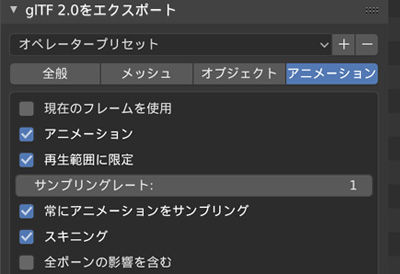
箱ねこの全パーツを選択して、トップバーの「ファイル > エクスポート > glTF2.0(.glb/.gltf)」をクリックします。glTF2.0をエクスポートする画面が表示されるので、アニメーションタブのアニメーションをチェックして、右上のglTF2.0をエクスポートをクリックしてglTFを出力します。
出力したglTFは、Three.jsに読み込む前にglTF Viewerで確認することができます。
Three.jsでglTFアニメーション
● Three.jsでglTFを読みこむ
出力したglTFは、GLTFLoaderで読み込むことができます。glTFで読み込んだオブジェクトの影のつけ方は、「glTFをThree.jsで読み込み」を参照してください。
//glTFの読み込み
const gltfLoader = new GLTFLoader();

gltfLoader.load('./data/road.glb',function(data){
	const gltf = data;
	const obj = gltf.scene;
	scene.add(obj);
});

//読み込んだシーンが暗いので、明るくする
renderer.outputEncoding = THREE.GammaEncoding;
● glTFのアニメーション
glTFのアニメーションを再生するには、Three.jsのアニメーションシステムのAnimation Mixer、Animation Clip、Animation Actionを使用します。
Animation Mixerはアニメーションを管理するクラスです。Animation Mixerのインスタンスをレンダリング関数で実行してアニメーションを再生します。glTFとして出力したアニメーションは、タイムラインを持つアニメーションデータであるAnimation Clipとしてanimationsに格納されます。
再生や停止などのアニメーションの操作は、Animation MixerのclipActionメソッドで生成するAnimation Actionで行います。
let mixer;
let clock = new THREE.Clock();

const gltfLoader = new GLTFLoader();
gltfLoader.load('./data/cat.glb',function(data){
	const gltf = data;
	const obj = gltf.scene;
	const animations = gltf.animations;

	if(animations && animations.length) {

		//Animation Mixerインスタンスを生成
		mixer = new THREE.AnimationMixer(obj);

		//全てのAnimation Clipに対して
		for (let i = 0; i < animations.length; i++) {
			let animation = animations[i];

			//Animation Actionを生成
			let action = mixer.clipAction(animation) ;

			//ループ設定(1回のみ)
			action.setLoop(THREE.LoopOnce);

			//アニメーションの最後のフレームでアニメーションが終了
			action.clampWhenFinished = true;

			//アニメーションを再生
			action.play();
		}
	}
	scene.add(obj);
});

function render() {
	requestAnimationFrame(render);
	renderer.render(scene,camera);

	//Animation Mixerを実行
	if(mixer){
		mixer.update(clock.getDelta());
	}
}
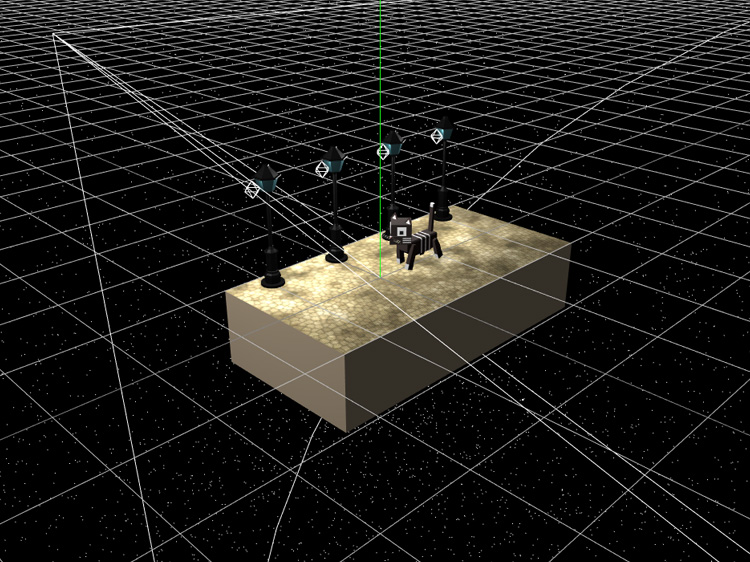
● 星空の制作
THREE.Pointsをクラスを使用して星空を制作しました。詳細は下記ページを参照してください。
//頂点座標管理用の配列
const positionsArr =[];

//配列に頂点座標を追加
for(let i = 0; i < 50000; i++){
	let vertex = new THREE.Vector3();
	vertex.x = Math.random() * 100 - 50;
	vertex.y = Math.random() * 100 - 50;
	vertex.z = Math.random() * 100 - 50;
	positionsArr.push(vertex);
}

//形状データを生成
const geometry = new THREE.BufferGeometry().setFromPoints(positionsArr);
const material = new THREE.PointsMaterial({size:0.025});
const particles = new THREE.Points(geometry,material);
scene.add(particles);
● OrbitControlsの設定
星空が綺麗に見えるようにOrbitControlsのズームの設定をしました。
const orbitControls = new OrbitControls(camera);
orbitControls.maxDistance = 20;
orbitControls.minDistance = 3;
● ライティング

ライティングはThree.jsで設定しました。
ポイントライトでは影がつかないため、影をつけるためのスポットライトも設定しました。
● script.js
必要なライブラリを読み込みます。
<script src="js/TweenMax.min.js"></script>
Three.js関連のライブラリはscript.jsからインポートするので、script.jsはtype="module"をつけて読み込みます。
<script src="js/script.js" type="module"></script>
最近ChromeのAddEventListenerOptionsのpassiveがデフォルトでtrueになり、OrbitControlsを使用するとpreventDefaultが効かないため、スマホでタッチした時に意図せず画面がスクロールしてしまいます。そこで、passiveをfalseにする処理を追加しました。
document.addEventListener('touchmove',function(e){e.preventDefault();},{passive: false});
完成したscript.jsです。
//===============================================================
// Import Library
//===============================================================
import * as THREE from './lib/three_jsm/three.module.js';
import { OrbitControls } from './lib/three_jsm/OrbitControls.js';
import { GLTFLoader } from './lib/three_jsm/GLTFLoader.js';

//===============================================================
// Main
//===============================================================
window.addEventListener('load',function(){
   init();
});

let scene,camera,renderer;
let orbitControls;
let mixer;
let clock = new THREE.Clock();

function init(){
    scene = new THREE.Scene();
    camera = new THREE.PerspectiveCamera(50,window.innerWidth/window.innerHeight,0.1,1000);
    camera.position.set(-3,2,3);
    scene.add(camera);
    renderer = new THREE.WebGLRenderer({antialias:true});
    renderer.setPixelRatio(window.devicePixelRatio);
    renderer.setSize(window.innerWidth,window.innerHeight);
    renderer.setClearColor(new THREE.Color(0x000000));
    renderer.physicallyCorrectLights = true;
    renderer.shadowMap.enabled = true;
    renderer.shadowMap.type = THREE.PCFSoftShadowMap;

    const container = document.querySelector('#canvas_vr');
    container.appendChild(renderer.domElement);

    window.addEventListener('resize',function(){
        camera.aspect = window.innerWidth/window.innerHeight;
        camera.updateProjectionMatrix();
        renderer.setSize(window.innerWidth,window.innerHeight);
    },false);

    setLoading();
}

function setLoading(){
	TweenMax.to('.loader',0.1,{opacity:1});

	let gltfLoader = new GLTFLoader();
	gltfLoader.load('./data/cat.glb',function(gltf){
		const obj = gltf.scene;
		const animations = gltf.animations;

		for(let i = 0; i < obj.children.length; i++){
			let mesh = obj.children[i];

			for(let j = 0; j < mesh.children.length; j++){
				if(j == 0){
					let mesh_child = mesh.children[j];
					mesh_child.castShadow = true;
				}
			}
		}

		if(animations && animations.length) {
	        mixer = new THREE.AnimationMixer(obj);

	        for (let i = 0; i < animations.length; i ++) {
	            let animation = animations[i];
	            let action = mixer.clipAction(animation) ;
				action.setLoop(THREE.LoopOnce);
				action.clampWhenFinished = true;
	            action.play();
	        }
	    }
		scene.add(obj);
		obj.position.set(2,0,0);
	});

	gltfLoader.load('./data/road.glb',function(gltf){
		const obj = gltf.scene;

		const mesh_floor = obj.children[0].children[1];
		mesh_floor.receiveShadow = true;

		scene.add(obj);
		obj.position.set(2,0,0);

		TweenMax.to('#loader_wrapper',1,{
            opacity:0,
            delay:1,
            onComplete: function(){
                document.getElementById('loader_wrapper').style.display ='none';
            }
        });

        threeWorld();
		setLight();
		setController();
		rendering();
	});
}

function threeWorld(){
	const positionsArr =[];

	for(let i = 0; i < 50000; i++){
		let vertex = new THREE.Vector3();
		vertex.x = Math.random() * 100 - 50;
		vertex.y = Math.random() * 100 - 50;
		vertex.z = Math.random() * 100 - 50;
		positionsArr.push(vertex);
	}
	const geometry = new THREE.BufferGeometry().setFromPoints(positionsArr);
	const material = new THREE.PointsMaterial({size:0.05});
	const particles = new THREE.Points(geometry,material);
	scene.add(particles);

	renderer.outputEncoding = THREE.GammaEncoding;
}

function setLight(){
	const ambientLight = new THREE.AmbientLight(0x222222);
	scene.add(ambientLight);

	const positionArr = [
			[-1.2,1.2,-0.75],
			[-0.2,1.2,-0.75],
			[0.8,1.2,-0.75],
			[1.8,1.2,-0.75]
		];

	for(let i = 0; i < positionArr.length; i++){
		let pointLight = new THREE.PointLight(0xFFFFFF,3,2,1);
		pointLight.position.set(positionArr[i][0],positionArr[i][1],positionArr[i][2]);
		scene.add(pointLight);
	}

	const spotLight = new THREE.SpotLight(0xFFFFFF,2,20,Math.PI/4,10,1);
	spotLight.position.set(-3,3,-1);
	spotLight.castShadow = true;
	scene.add(spotLight);
}

function setController(){
    document.addEventListener('touchmove',function(e){e.preventDefault();},{passive:false});
    orbitControls = new OrbitControls(camera,renderer.domElement);
    orbitControls.enableDamping = true;
    orbitControls.dampingFactor = 0.5;
    orbitControls.maxDistance = 20;
	orbitControls.minDistance = 3;
}

function rendering(){
	if(orbitControls){
        orbitControls.update();
    }
    if(mixer){
		mixer.update(clock.getDelta());
	}
	requestAnimationFrame(rendering);
    renderer.render(scene,camera);
}

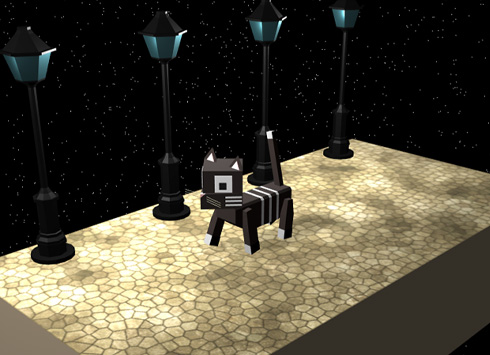
完成したデモになります。glTFをThree.jsで読み込んでアニメーションするデモなので、パソコンとスマホで見ることができるようにしました。